Tuesday, March 24, 2020

Mers-el-Kebir Part 2: Bombardment

Belatedly picking up the tale of this game, as over the past year I've run it twice more but would be remiss to post those reports before finishing this one!  When we left off, negotiations had broken down between the British and French over the disposition of the Marine Nationale's major warships after the latter's capitulation.  From here on out, everything is driven by the players.

French Deployment
For the coming battle, since I am teaching and running the game I will command all of the French destroyers in both the Mers-el-Kebir anchorage and off-map in Oran Harbor, as well as the coastal batteries, and the seaplane carrier Commandant Teste.  Andy, sharing the French with me, will take the four French capital ships.  We were restricted to the historical arrangement of ships in the anchorage, in which notably all of our vessels are moored with their sterns to the pier.  Although they have built up steam during the negotiations, a rapid departure still entails a significant risk of collision, and the guns of the battlecruisers Dunkerque and Strasbourg are all concentrated in two forward turrets, pointing away from the British!

An aerial photograph of the anchorage at Mers-el-Kebir before the attack.

Large Destroyers, from left: Le TerribleKersaintLynxTigreVolta, and Mogador
Capital ships, from left: DunkerqueProvenceStrasbourgBretagne, and Commandant Teste

British Deployment
Command of Force H is similarly split, with Ted aboard HMS Hood leading the cruisers Enterprise and Arethusa, all fast enough to keep pace with the modern French battlecruisers, while Edwin commands the slower battleships Valiant and Resolution.  Each of them each also has three destroyers as escorts, with the remainder screening Ark Royal somewhere to the rear.  Allowed to deploy freely as long as they remain outside the perimeter of the defensive minefields, Ted and Edwin decide on an aggressive approach to maximize their initial advantage, opening fire at 13,500 yards (historically the British bombardment was conducted at 17,500 yards).

Force H from left: HMS Resolution, Valiant, Enterprise, Hood, Arethusa

Battle Begins

Because the onus is on the British to begin the engagement, I have decided that the first round of the scenario skips movement and begins with gunnery.  Having settled on their tactics, Ted and Edwin open fire!  Their choice of targets highlights their game plan: with all three heavies aiming at the two battlecruisers despite the penalty for doubling up, they clearly aim to hamstring any attempt to escape.

Initial salvos concentrate on Dunkerque and Strasbourg.

Their determined target selection pays immediate dividends, with good dice rolls and bonuses for firing first at stationary targets resulting in numerous penetrating hits on both capital ships!  A fire also breaks out aboard Commandant Teste after a 6" shell strikes her.  The French response is limited to the stern "X" and "Y" turrets of Provence and Bretagne and the battlecruisers' secondaries.  The older, smaller-caliber dreadnought guns have poor odds of penetrating the British armor at this range, so Andy targets the cruisers instead to hopefully put them out of action quickly.

 Chaos in the anchorage as shells crash among the ships and guns roar in response.

French return fire damages HMS Arethusa, and, what's that?  Hood is burning!

In the second round, the ships begin moving across the table.  The numbers on the wake tokens track the current speed of ships or formations, with each 1" of movement representing 5 knots.  There is a risk of collision if ship bases overlap, so players will have to carefully consider their pre-plotted, simultaneous movement.  Due to their greater maneuverability, I allow the escorting DDs to simply tag along with their charges so that the other players can learn the basics controlling a few ships, while I manage the large French destroyer flotilla.

French ships clear their moorings while an ominous cloud of smoke trails behind the British flagship...

The gunnery exchange continues, with heavy 15" guns single-mindedly pounding the French battlecruisers.  Dunkerque's superfiring "B" turret is destroyed, robbing her of half her firepower, and both sister ships lose hull boxes and secondary turrets.  Aviation gas spreads flame across their decks from ruined floatplane hangars, and stray shells start fires in several shore facilities as well.  Force H's cruisers suffer too, but HMS Hood's damage control parties are able to extinguish the fire aboard her, and with the French unable to bring much of their firepower to bear, the contest at this stage is decidedly unequal.

Smoke from burning ships obscures much of the harbor.

Disaster!  In the rush to escape, Bretagne collides with the badly-damaged Dunkerque, sealing the latter's fate!

The loss of Dunkerque is a serious blow to the French.  Together, she and Strasbourg posed a serious challenge for the British to catch and defeat in open water, and would have forced Ted to keep HMS Hood with the slower battleships, but her loss gives Force H greater freedom of action to counter any breakout attempt by the remaining ships.  Strasbourg has also taken moderate damage, with minor damage to Commandant Teste and Bretagne.  For the British, the only damage worthy of note is that suffered by the leading cruiser Arethusa, which has been effectively mission-killed with the loss of all three of her turrets and one of her engine rooms.

At this point, although my team is taking a pounding, I have to say I'm quite proud of how the scenario is playing out.  The British bombardment plunged the harbor into chaos historically, with several ships being run aground to prevent them from sinking, and the situation in our game is similarly disruptive!

The British don't get to have it all their way, though.  Each round more French ships get under way, and the close approach that Ted and Edwin planned to maximize their firepower leaves them deep inside our threat envelope as well.  Historically, the British force ceased fire at about this time and pulled back to observe the situation, but our opponents' course has committed to them to several more rounds of combat and given the French destroyers present an opportunity to close the range.

The table at the end of round 4.

Friday, July 05, 2019

Mers-el-Kebir Part 1: Preparation

In the summer of 1940, the fall of France put Britain in a desperate situation. The Royal Navy was stretched thin controlling the sealanes that connected the island to its Commonwealth Allies, and the threat of French warships being seized by the Axis and used against Britain dominated naval concerns, despite French assurances that they would scuttle their own ships before that could occur.  For the French, the existence of their fleet was the only leverage they had over their German occupiers; allowing any foreign power, even their former ally, to gain control over those ships would leave France helpless.

To Winston Churchill, desperate times called for desperate measures, and when the British fleet arrived at Mers-el-Kebir to deliver his ultimatum to the French fleet anchored there, neither side was willing to or capable of reaching a compromise.  Suitably dramatic scenario researched, I set up to build the order of battle for each side.

The British fleet is Force H, commanded by Vice-Admiral Sir James Somerville, urgently assembled in Gibraltar to replace the French fleet that had counterbalanced the Italians in the Western Mediterranean:
  • Battlecruiser HMS Hood (flagship)
  • Battleships HMS Resolution and HMS Valiant
  • Aircraft Carrier HMS Ark Royal
  • Light Cruisers HMS Enterprise and HMS Arethusa
  • 8th Destroyer Flotilla (6): HMS Faulknor, Foxhound, Fearless, Forester, Foresight, Escort
  • 13th Destroyer Flotilla (5): HMS Keppel, Active, Wrestler, Vidette, Vortigern
The French order of battle includes most of the Force de Raid (Raiding Force) under Vice-Admiral Marcel-Bruno Gensoul, as well as a number of other vessels that were concentrated in French North Africa, first to oppose the Italians and then later to remain out of reach of the German occupation:
  • 1st Line Division (2): Battlecruisers Dunkerque (flagship) and Strasbourg
  • 2nd Line Division (2): Battleships Provence and Bretagne
  • Seaplane Tender Commandant Teste
  • 6th Scout Division (2): Mogador, Volta
  • 4th Scout Division (2): Tigre, Lynx
  • Elements of 9th and 10th Scout Divisions (2): Kersaint, Le Terrible
  • 7th Destroyer Division (3): Tramontane, Tornade, Typhon
  • 8th Destroyer Division (2): Bordelais, Trombe
  • 5th Destroyer Division (2): Brestois, Boulonnais
  • Shore Defenses (3): Fort Santon, Canastel Battery, Minefields
British on left, French on right, starting with flagships.
  • British Total: 2 BB, 1 BC, 1 CV, 2 CL, 11 DD
  • French Total: 2 BB, 2 BC, 1 AV, 6 DL, 7 DD, 2 Coastal Batteries, Minefields
From a distance they look pretty evenly matched, but the two forces have very different strengths and weaknesses.  Although outnumbered, the three British capital ships each mount 4x2 powerful 15" guns, capable of penetrating the hulls of the French capital ships at any range.  The French boast 50% more barrels, with the new Dunkerque-class mounting 2x4 13" guns and the older Bretagne-class an intimidating 5x2 13.4" guns.  Their lower caliber, however, means the British enjoy an "immunity zone", a range at which the French shells will travel too slow to penetrate the armored hulls of the British ships, but will also fall at too shallow an angle to threaten their thinner decks.  If the British players can maintain this distance, they will nullify the French numerical advantage while exploiting their greater individual firepower.

For the escorts, the situation is reversed.  The British cruisers and destroyers all mount rapid-firing guns that are very effective at close range.  However, the 13th Destroyer Flotilla is mostly of WWI vintage, effective for anti-submarine warfare but not up to a surface fight.  The French destroyers are all of more recent construction, longer-ranged than their British counterparts and including several "large destroyers" that mount more and larger-caliber guns.   If the French can bring their superiority in light units to bear, the British may be unable to effectively defend their capital ships against a devastating torpedo attack.

I don't expect the various shore defenses to inflict much damage, but their presence limits the British options for attack while also constraining French maneuverability.  Although we won't use aircraft during the tactical battle, both forces also have a single aviation vessel, a weak but valuable piece that the players will have to consider how to protect.  If time allows, we'll experiment with allowing one or both of them to launch a single airstrike at the end of the game.

I have omitted a number of small-caliber coastal batteries, as well a few auxiliary ships that were present; they're unlikely to affect the game and representing them wouldn't be worth the effort.  For perspective, all of the miniatures are in 1:6000 scale, with the largest, HMS Hood (bottom left), less than 2 inches long.


The ships are all Figurehead 1:6000 naval miniatures, mounted on metal bases that I sculpted wakes onto using Milliput.  The coastal batteries are scratch-built with snippets of paperclips embedded in fortifications I sculpted and based the same way.  I only got as far as a basecoat, but at table distance it's easy to tell the two sides apart, and the size of each base provides a nice visual cue to the type of ship.

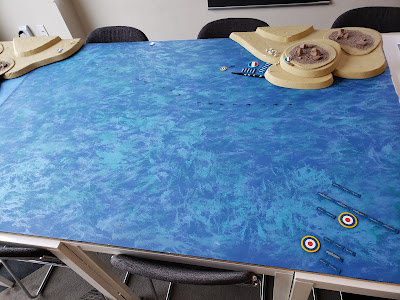
The local game center has a handful of old ocean boards that rarely see use, so the staff were a bit surprised when I asked for help getting the big 6'x4' panel out!  A flat blue surface is all the terrain you need for most naval games, but having to work around landmasses and fortifications is part of what makes this scenario interesting.

An assortment of the store's desert hills made a suitable North African coastline, and a cluster of a few small scale buildings was a convincing harbor town (although I really should paint them up at some point).  The batteries were placed at their proper positions, and the mine fields indicated by some teeny-tiny torpedo tokens.  Finally the French force was placed at their moorings, and I took some glamour shots of the whole set up before the players arrived to rewrite history.

The full length of the 8'x4' table, looking east.

The French forces begin the game in port, as they did historically.  Their capital ships, large destroyers, and seaplane tender are in the anchorage at Mers-el-Kebir.  The remaining destroyers are off-map in Oran harbor to the south.

Looking north, with Oran just off the bottom of the table.

The approximate table area outlined.

Canastel Battery (left) and Fort Santon (right).
The minefields stretch between them across the mouth of Oran Bay.

The British objective is to remove the French fleet as a potential threat.  They only earn victory points for crippling and destroying French ships.  The French objective is preserve their fleet, and so in addition to damaging British ships they will also score half points for each ship that exits off the eastern table edge or that is still seaworthy when the British withdraw.  This puts the onus on the British to inflict as much damage as they can while the French fleet is still getting underway

A photo of the anchorage at Mers-el-Kebir before the attack.

Large Destroyers, from left: Le TerribleKersaintLynxTigreVolta, and Mogador
Capital ships, from left: DunkerqueProvenceStrasbourgBretagne, and Commandant Teste


Force H arriving in its historical disposition, with HMS Foxhound delivering the ultimatum.

Up to this point I've followed history, but from here on out it's in the players' hands!

Part 2: The Bombardment